
Creating My Santa Suit
- Santa Stuart

- Jun 4, 2021
- 11 min read
Updated: Jun 8, 2021
A previous episode was made documenting my process for sewing my first Santa suit. (This video was part of the original "Secrets of Being Santa" series which can still be found on the Jr. Claus Workshop's YouTube Channel.) There are still things that could be elaborated on and perhaps make some more sense to you if you could see the photos I still have from that project (I didn't take any video unfortunately). And so, that brings us to the post today.
Considering Options

In preparation for my first season in December of 2016, I eventually ended up ordering two different suits. The first was a plush burgundy colored one that bled into the fur before my season began so I had to strip and restore color there. While that was happening I ordered a bright scarlet velveteen one as a backup. Because of the thickness and the color issues of the plush suit, I ended up using the velveteen one as my primary suit during my first and second seasons and used it exclusively my third.
With these two suits hanging in the closet, along with issues with the three B's (Boots, Belt, & Beard), I started searching the internet more furiously than before. It's important to once again mention I had yet to have any contact with the online Santa Claus community until my third season. This made it really difficult to find good quality goods as many of these online resources are a bit niche and hidden from general search words.

After my first season, I knew I wanted to eventually craft a suit that would meet my expectations and requirements of functionality as well as style. The first thing I had to do was to find the right fabrics and fur. This process took a good two years or so (and is still going on for additional pieces). I ordered swatches (little samples of fabric) and swatches of red fabric and white fur of all types. Each of these from some online store or website as there wasn't much offered to me at my local Joann's. All in all, I think I spent around $100 over the course of that two year search.
See, I enjoyed my suits as anyone could, but they were stock suits around $50 a piece that weren't tailored to me. The sleeves were a bit too short, the bottom of the coat didn't go down as far as I was comfortable with, the pants were nothing more than glorified sweat pants that ended at the knee. It was difficult and distracting to provide the children with the interaction they needed when I was constantly worrying about all the different things that could go wrong.
Such a position Santa Claus would never find himself in. If I wanted to give my all, I needed to put in the work to make these worries go away so I could portray him more accurately (which is hard to do for a legendary figure of his status).
I made up my mind that I would do what I could to make a suit up to the standards I sought. I looked many times on different Santa suit and clothing sites only to be disheartened by the price tag in the hundreds, and some even more than $2,000! There was no point in me saving up and buying an expensive suit if I was but a small town Santa. I decided experience with a sewing machine and gathering the material myself would make me more grateful for the suit and save me a lot of money in the long run.
Fabric & Fur
Though I liked the fabric of my velveteen suit, I wasn't enthusiastic about the bright scarlet. I've always preferred the Tim Allen Santa Claus look more than any other, and his suit was always a darker, and more regal, shade of red. I didn't want burgundy or purple, but I wanted to have something that didn't look as bright and potentially whimsical as the color I had been wearing.

After I discovered that my velveteen suit was velveteen (wasn't sure for a while, I thought it may have been velvet but that was WAY too expensive so something wasn't adding up) I realized how affordable it could be. The swatches sent my way were acceptable in color and texture and the gears in my head started turning.
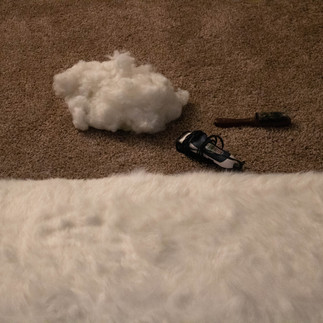
Searching for fur seemed almost impossible. I wanted fur that matched the look of the suit from The Santa Claus 2: The Mrs. Clause but wasn't successful until I stumbled upon a 3x5 rug on Overstock.com which looked close enough (it had been suggested to me by my first Santa contact Stuart Landerman "The Idaho Falls Santa Claus" and his wife Angie that using a fur rug from Costco to cut out strips for fur trim had worked for them). When the rug arrived, I was disappointed as it wasn't fur but did have the lovely look I needed.
I loved the feel and texture of the polyester and acrylic blend that the fur on my velveteen suit had. Nothing came close (and hasn't as of the date of publishing this post). Finally, I gave into other options and began looking for fur that was neither too wiry or too short. I only wanted thick fur about one inch in length.
I ended up buying a medium sized faux fur rug from Overstock.com with the intention of shaving it down to one inch. I bought a pair of clippers and cut down that fur a good many times over the course of two weeks. It was difficult to get everything the same length in one pass which led me to taking a boar bristle brush and fluffing it as I went along. Clipping the hair down helped it look thicker and not so wiry. I only did this because I wanted to. I didn't have to do it, but I wanted a particular look and I felt this was the way to get it.


I discovered with the subsequent creation of my and my wife's Santa robes that cutting the fur out in the pieces you need before trimming the hair worked very well. The trick with cutting faux fur into pieces is to have the hair facing down and the backing facing up. By sliding your scissors gently between the hair, trying only to cut the backing with small cuts, you damage the hair very little and get an accurate cut. If you have an "exacto knife" or some other tool which would enable one to cut just the back without endangering the fur itself that would be ideal (but I just use my sewing scissors).
Researching the Look
I had in mind what sort of look I would like. Very much a Tim Allen inspired look (I even considered hiring out for some embroidery at one point or another). This would solve some of the problems I had with my stock suits. The bottom edge of the coat would sit more comfortably, the pants would be longer (as Tim Allen's boots weren't the biggest so his trousers had to be much longer so they could be tucked into his boots), the sleeves would be longer and fitted to my form, the suit's waist would be tailored to my stuffing (or fat suit, whichever you prefer), and I would have plenty of belt loops to keep my belt from sliding down under my belly (this problem I tackled with my velveteen suit my third season as I relocated the belt-loops from the seam underneath the arms to either side of the fur trim in the front).

There seemed to be two main cuts of Santa suits. Those that are cut like shirts, and those that are cut like functional coats. The stock suits I had were very much like untailored shirts that only came down so far (these are commonly seen on those who have not had a custom suit made for them) and I really desired the style of the latter because it looked more authentic (and would also help keep me warm when needed because the winter weather in Rexburg, Idaho can rival that of Antarctica).


I spent hours upon hours watching The Santa Clause trilogy, looking at BTS (behind-the-scenes) photos and footage of them. I watched other Christmas films that had Santa in them. I looked up blogs and costume shops to see how things looked. Pinterest was helpful in providing me with a great place to start. (Almost two years after completing my suit, I even found the costume shop in Hollywood where production companies can rent a film original Tim Allen suit!)
A helpful method for listing what specs I wanted the suit to have was to watch how the suits looked on the actors. For example: I'm not as tall as Tim Allen nor was my fat suit as large as the one he wore. However, I did like where the sleeves fell on his knuckles and how thick the fur was in ratio to his hands, where the coat ended on the thighs, and where the belt was in relation to everything else (some Santas wear their belts too high and others too low). I would pause the films, take screenshots, or download other photos I found helpful and store them to a folder on my computer for easy access while I was sketching or making a list (checked more than twice). This helped me determine an average fur strip width of 6-7 inches for the most part. Now that I had the width, I needed measurements for the length.
Sewing
Though there are a few places that do close replicas to the Tim Allen suit (see NeverbugCreations on Etsy), there isn't a pattern available for download or purchase that follows the original designer's construction (as far as I know). My only option was to eyeball and experiment with an already existing Santa Claus pattern which would give me guidance on how a regular suit would be sewn while still letting me tweak a few things.
I chose McCall's M5550 Santa pattern and ended up going with a size large (though I have bought the larger sizes of the pattern as well for my Cola suit construction as the pieces gave me more leeway and I needed larger and longer trousers anyways). I purchased some very cheap fabric, a Brother sewing machine, and got to work pinning, taping, and changing things till I got the basic look I wanted.


Then, with my altered pattern, I very carefully cut the pieces out of the velvet fabric (which I had tried to set the dye in using salt and white vinegar in the bathtub but I honestly have no idea if that helped at all). I was very excited that all my hard work was paying off when I realized I also had to do the same thing AGAIN but for the liner. Now I have accepted this "bummer" with my sewing projects.
For the liner I used the cheapest costume satin I could find. Bright red at that! It has since been brought to my attention that that fabric isn't the best for making a liner as it's not as breathable as other fabrics (I shall delve further into this subject on my Cola-Style post in the future). The result has been the liner sticking to the skin and not being the most comfortable (though tolerable). The reason I thought this would make a great lining material is because it was used as the liner in my stock suits. Now I know that both my plush and velvet suits were inexpensive for another reason (cost of materials).
I added 2 inches to the pattern for the trousers (they could use another 2 inches for a total of 4 to fit comfortably), disregarded the instructions for pockets and other seams that made it more complicated, and only attempted to include a fly and zipper on the first pair. After that I knew it was too much hassle with my limited experience and a drawstring at the top along with a pair of suspenders would help me get dressed quickly. In The Santa Clause trilogy, Santa's trousers have a front flap with buttons. Perhaps someday I'll get there but when making this suit there was no reason to have buttons or a flap there as no one but myself would ever see it.
The coat came together and I also made the bottom and sleeves a bit longer so I could then remove what I needed for the fur (it's always better to have a bit more than you need than not enough). The collar was a bit difficult to come up with. The style of collar I wanted was different from what was in the original pattern. I got as close as I could but still wasn't happy but didn't know how to fix it. I eventually went back and redid the collar once I found a similar pattern I could copy from. It's still not exact, but it's better than it was.


The zipper that goes up the front of the coat I had to put on twice, though one side sits slightly higher than the other. It was very very difficult for me to sew the zipper on with the machine and I'm just glad it didn't ruin all the work I had already done. I am forever traumatized by that experience and I don't think I can ever do zippers or even button holes with a machine nor by hand.
Belt loops were more of an afterthought but I wanted them to hold the belt in the proper place and this is where I had made plans long beforehand. This process had me putting on and taking the coat off many many times as I adjusted the belt and lightly drew with a pencil where things should be. Lots of pinning on the belt-loops and seeing what was straight and what was not once the coat was taken off.
Because I wanted the belt to follow the waistline and not be straight across the coat, I had to figure out the placement of the loops so they looked great when the coat was being worn. Though the belt loops are vertically straight, the front two are on one plane and the back two are slightly on another. In my sketches, I designed them to have two parts. The real belt loops would be reinforced all the way around and sewn to the coat. The faux belt loops would act as fancy looking covers with a button at the bottom. The reason I did this was I didn't want the weight of the belt and buckle to be constantly wearing the thread that held the button and bottom of the loop in place. By having the real belt loops (big enough for a 4 inch belt) underneath the faux ones, I didn't have to worry as much about losing a button (I've never lost a button!).


With that, the only thing left to do was to make a Santa hat. Because the rug had a faux leather backing (which I only recently discovered you can remove and the fur is then like any other faux fur you can buy) the trim came out pretty thick. I have a whole loop of fur from which the cap is sewn into. Most caps have the fur sewn on the outside of the fabric, mine is a bit different in that the fur loops around, is sewn to itself, and then sewn to the opening of the cap. This provided me with a good amount of fur (though sometimes a bit warm). I did not create or insert a lining into my hat as I refused to have more costume satin rubbing or sticking when I would sweat.
These photos are the before look I had with stock suits:


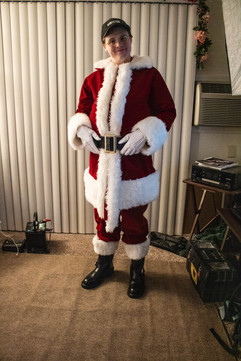
And these photos are the after with the suit I made:


Just because you lack the size of budget or skills needed to create a custom suit doesn't mean you have to abandon all hope of improving your look. It took me years to find the color of fabric and the kind of fur I wanted before I set out on this little journey. It's never too early to start preparing for Christmas. Begin sketching out your ideas today and making plans for the future. If you can afford a custom suit, check out ProSantaShop.com and SantasTailor.com for very good looking and quality clothing. Tell them Santa Stuart from the Jr. Claus Workshop sent you.
Yours as always,
Santa Start
You’re doing a wonderful job, Stuart Deacon Jr. — I always enjoy reading your enthusiastic & inspirational posts!! Hope you & your lovely family are all keeping well.
Every since I found your YouTube channel I was excited about be a Santa this year (2021), this will be my 1st season and I did get the 2000.00 custom suit made for me. Thank you for the inspiration. I wouldn't have known where to start without your video.